Permanently disabling Windows Defender/MsMpEng.exe

Standard

After some googling I’ve found that either nobody managed this so far or nobody bothered to publicise how to do it so here’s the current (Windows 11 23H2) solution. I tested this on Win11 Pro but I’d expect it to work on Home as well because we’re not using Group Policies; the idea is to ban the System (account) from accessing MsMpEng’s location.

Please note that Windows Defender seems to sit in two locations – when you have a fresh Windows installation it will launch from C:|Program Files\Windows Defender and eventually it will migrate to C:\ProgramData\Microsoft\Windows Defender (possibly a subfolder within one, such as C:\ProgramData\Microsoft\Windows Defender\Platform\4.18.24020.7-0\ — in that case we’re still only going to be interested in the C:\ProgramData\Microsoft\Windows Defender part, not the subfolders themselves) so you’ll have to do the below procedure twice (once for each of those locations).

I’ve tested an update from 22H2 to 23H2 and the folder in Program Files would need to be “redone” (the procedure rerun that is) post-update but the ProgramData place remains ok. A caveat is that since the monthly Windows Update usually tries to patch the ProgramData location that update will keep failing because SYSTEM (acct.) will be denied write/modify access.

Tools you need:

  • TakeOwnership -> https://vsthemes.org/en/dnew/810.html (then click on Download file. It should be a zip file – unzip and exec Take Ownership Menu Hacks\Add Take Ownership to Context menu.reg, okay-ing all prompts)
  • ExecTI -> https://winaero.com/downloads/ExecTI.zip (no need to install, just run when prompted)
  • Total Commander (this is optional but makes things a bit easier) -> https://www.ghisler.com/download.htm
  • You’ll generally need Admin access, mere User (level) accounts won’t work. [you don’t need to enable the Admin acct per se but you need to be able to pass UAC]

Steps:

  1. As mentioned above, if not already then run the reg file for TakeOwnership, clicking through anything it asks (no need to repeat once done).
  2. Install TC, you don’t need a key for it/it’s free to try.
  3. Run ExecTI and point it at the TC exe file. This is likely to be C:\Program Files\totalcmd\TOTALCMD64.EXE but will likely produce an error if TC is already running so make sure it’s closed. Also possible to produce an error if you’re running ExecTI from a network drive so run it from a local drive.
  4. Within TC navigate to C:\ProgramData\Microsoft or C:\Program Files\ (depending on which folder you’re doing) and then scroll down to the folder Windows Defender and use the keyboard shortcut Alt+Enter (or right-click and click Properties).
  5. Then click on Security. You’ll see something like the below. Once you’re here click into Advanced towards the bottom.
  6. Within Advanced you’ll see the owner being TrustedInstaller or (System, if you’re in ProgramData). The reason why we’re running TC in ExecTI is because ETI mimics TrustedInstaller, which is above the Admins in terms of permissions and is a sort of Root-ish level account.
  7. Next to Owner, click Change
  8. Click Advanced again
  9. Once you see the below click Find Now – no need to fill in anything, but after you click that button it’s likely you’ll need to widen the first column of results (“Name”).
  10. Scroll and pick your own username and then click OK and then . [yes I’ve jumped horses for those of you more observant the computer name has changed]
  11. Once you get to the below make sure that Replace owner on Subcontainers and Objects is checked. Also click Enable Inheritance. Also make sure that the Replace all child ….. is checked. Once all that’s done, click OK and then Yes through anything you get asked.
  12. Once you’ve OK’d out of the above the main TC window will return (the Security/Permissions window will close). Alt-Enter again to open it up again. This time click Edit.
  13. Once there click SYSTEM and then Deny and then Full Control. Basically you should generally look like the below.
  14. Once you click OK there should be a warning about setting a denial. Just click Yes. The process will take a while. OK again if needed till you’re totally out of Properties
  15. Restart Windows
  16. If once you’ve restarted Windows and Antimalware Service Executive is still running then make sure you’ve applied the above procedure to the location of the file. While that might sound stupid of a request but I tried the procedure with a fresh copy of 22H2 and there had been nothing in the ProgramData\Microsoft\Windows Defender\Platforms folder so I blocked the stuff in Program Files but upon restart it just ran from within Platforms and had to redo the procedure.
  17. ps: not having _any_ antivirus is a bad idea, obviously, so do this at your own risk.
  18. pps: I hate WordPress’s “New” editor and I hope it rots in hell along with all those that enforced the disablement of Classic Editor. F-you.

Overcoming the “new” Google Drive FS Drive Letter issue with Junction

Standard

As Google are rolling out the unified GD suite to the consumer sector I found it rather very annoying that we are now 1) forced to be given a drive letter and 2) if you are streaming the data (rather than mirroring) the old folder becomes a jungle of crap that is no use to anyone.

This will only be of relevance to you if you chose to stream your data (otherwise the old folder remains intact.) While it’s not entirely possible to do away with the new drive letter you can nonetheless use Junction to create a direct link and therefore retain your old folder structure and links. You’ll need to move the cache folder though not to overlay the old folder name. (and delete the old folder — but remember, if you are mirroring your data, don’t do this, else you’ll actually delete all your stuff for good. Only do this if you’re streaming and the initial setup is done and Google tells you the folder can be deleted safely.)

Use the logic below:

No description available.
…where “d:\google drive” is my old GD folder from pre-upgrade times, the “g:\my drive” is the current post-upgrade path (G being the assigned drive letter). Make sure not to use trailing \s. The cache folder is totally unrelated and is elsewhere. With this in place you can directly work with the old path and Windows takes care of the rest.

These above are actually the same, linked mirrors (not duplicates)

Travelling Pseudo-Offline: The (Unofficial) Wikitravel Offline App

Standard

Right, happy to announce now that the world is on varying levels of lockdown and those that still have jobs aren’t really spending money on flights that I finally got around to solve one of the bugbears that has been poking me for years, namely the lack of offline support/solution for Wikitravel.

For those of you that don’t know, Wikitravel (henceforth WT) is a more impartial, dry and factual, less “review-y” site than say Tripadvisor, which I latter I never managed to accept as impartial. (Who cares what other people think, really? Travelling isn’t a talk show.). The only problem with WT is that they don’t have an app, even though in terms of network they belong to the Wikipedia system, which does have a pretty brilliant app. In other words especially when one is away and there’s limited/expensive/etc data coverage in the yonder it’s very difficult to rely on WT for the sort of information on what to see and what not to see.

That’s now been solved and I’m happy to announce that I got annoyed enough to make an app for Android and you can find it at https://play.google.com/store/apps/details?id=b4a.wikitraveloffline along with a somewhat lengthy explainer video at https://youtu.be/csw1Xyhbvbw

Generally nonetheless the idea is the following: WT pages you browse within the app get cached into a SQLite database locally so you can pull them when you’re not online.

Downloaded data doesn’t include images but only the text (plus some formatting so that stuff doesn’t look particularly terrible.) — the app works in a variety of languages and can pull data from WT in those languages as well, subject to availability, although you’ll find most things are there in English and a lot fewer things exist in the other languages the WT API and system supports.

The explainer video I linked above has a lot more detailed information what the app does and does not (do) and how, so I suggest watching it. Nonetheless see for an FAQ below.

How does the app work?
For non-techy users, the app works by querying Wikitravel’s website, and storing the returned data locally. That’s the simple explanation but it’s a gross oversimplification.
There is more to it though and it’s important you understand what it can do, can’t do, and why. In reality the app queries the Wikitravel API, which, in non-technical terms accepts a packet of data and then sends back information based on the request. While this is in theory a lot like what you have in your browser (e.g. Chrome), actually it’s rather different because the API is very far from being perfect.
In order for the app to be able to function as offline data storage the returned data has to be captured and cleansed. This also means the app needs to be able to monitor and control what you (can) do inside the app. While this might sound odd/scary it’s obvious and important. There’s something called WebView in Android world, which is the element of the app that shows the web contents and which you will be reading/using. When you search for “London” (or any other place) there are 2 queries that get sent out. First a query to establish if there is a page called “London” in the language of your choice and if so what’s the internal PageID and current RevisionID. At this stage the app checks if that specific combination is already stored in the local database and if so you’ll see the locally stored data, if not, another query gets fired off for the actual online content and eventually the data will be presented inside the WebView (from a strictly non-technical approach, “the app”.).
In an optimal world the API should be smart enough to send back only things that are relevant to the mobile user, but in this case the API sends back a lot of junk as well. The main problem is with the links and there’s a lesser issue with the stylesheets too.

What’s the issue with links inside the app?
The app can only read and cleanse stuff that comes through the API, nothing else. If it can’t read the data, it can’t store the data for later use offline. When you search for something (let’s stick to London), the app will initially speak to the API, store the data locally, and show the data to you. But if you click on a link inside the WebView (even if it’s going from “London” to “Oxford” and the result keeps showing in the WebView itself), you clicking on that link will directly communicate with the Wikitravel website, not the API. This is a problem because if the app allowed you to talk to the website directly that would circumvent the ability to capture the data but it wouldn’t be obvious from your point of view (because it looks almost the same if it’s data though the API or the website) and ultimately you’d end up going on your holiday thinking that the Oxford page was saved, but in fact it wasn’t and you’d be really pissed off.
How is the issue with the links solved?
As it’s been said, when the API sends back data it gets cleansed. The code makes an attempt to find all tags that are links and delete all of the tags that point to external pages (non-Wikitravel that is) or internal pages that are irrelevant (such as “edit this section”, or “this article is a stub”, etc.). The code tries to err on the safe side of things, and it may occasionally happen that a relevant link gets dropped especially if it’s malformed on the website (e.g. the tag doesn’t get followed up with an tag). Some links may get converted to simple text and look a bit odd as such (namely the location markers that point to references, so if you see something like “[72]” and such that used to be a link and now is just text. I might amend the code to deal with them but it’s tedious and irrelevant.
Ultimately the links you will encounter should all be internal Wikitravel page links, like “London”, or “Oxford” etc. When you click on that link the underlying code will capture the target link’s address but actually stop the click happening and instead converts it to yet another API call so you remain within the framework.

What’s with the stylesheets?
Stylesheets are the underlying code (aka “CSS”) that tells the browser what the webpage should look like in terms of font styles and such. What would be sensible was that the API sent back very simple stylesheet related information, like [p], [h1], [h2], [ul], [li], [b] and so on, which in plain English mean “paragraph”, “header lvl 1 or 2”, lists of various sorts, bold, etc. Instead the API sends back the whole shebang of 100ish stylesheet class references but not the stylesheets themselves, which are actually scattered around on the Wiki servers and complicated to line up with what we need here, so I had to recreate a simplified version of the wiki stylesheet and apply that somehow. So, the design might not fully line up with the Wiki website, apologies, it’s fiddly and I think it’s not worth it. [gawd i hate wordpress can’t f…ing parse html tags as text]

Will you add new languages?
No — the API is available in the languages already included in the app, and as such I can’t add more unless they do.

The translations are poor.
They’ve been Google-translated.

Will there be an iOS version?
Unlikely. I’ll see how many people use this one and if it seems financially sensible. B4A has a sister-version, called B4i but I never looked into it.

The app is slow. Why?
The API is slow. Don’t blame me. It’s pretty dreadful at times, I know. It takes anywhere between 2 and 30 seconds to return the API data from the server (which is otherwise only a few hundred kilobytes) and takes another 3-4 seconds to process/cleanse it.

Why can’t I log in?
Because considering all the pfaff about the API outlined above it’s tedious to code and for the majority of people it’s irrelevant. The app isn’t about editing contents on the site but retrieving it.

Cloning & Extending a HDD partition on Mac

Standard

Sadly this one will be one of those posts that will have no screenshots as I had to go through this madness a month ago and I don’t have the tools at hand any more but I’m hoping it will still be useful. A friend of mine gave me her 2007 MacBook to get the 80GB HDD replaced by something larger so I picked a spare 250GB that I had and cloned it in clonezilla – that was the easy part.

Upon booting into the laptop everything was fine, except the partition was still only 80GB, so I went into utilities/disk utility and attempted to extend the partition to which “computer said no”, or in other words

MediaKit reports partition (map) too small

This is because OSX is an idiot and it doesn’t recognise the overall size of the disk in comparison to the partition itself and whatever’s in the partition’s descriptors take priority over empirical results.

If you google for that error you’ll find many and more solutions, I suggest this, and links from that site, namely this. I tried that one and managed to completely ruin the partition, which may have been because I’m an idiot; however I think I followed the procedures correctly. Assuming you’ve found this blogpost you’ve probably already tried the method above because it will come up higher in the search result list, which also means it didn’t work for you.

Back to the process…All the above was followed by googling even more, which resulted in me trying to use various Mac-enabling tools on Windows (TransMac), copying files, reformatting the new HDD with the appropriate type of file system (JHFS+ I think), poking around in gparted (doesn’t support partition extensions over HFS+ so I tried converting the whole crap to NTFS, extending the partition, putting it back to HFS+ with all sorts of free and paid tools you find online just to find none of them did what I wanted, I suggest not wasting time on them).

Essentially after playing a bit more ping-pong with the system I gave up and turned to another tool: virtualisation. It’s against T&Cs but you can get a virtual OSX running in VMWare/Virtualbox, I’ll let you find out how but it’s pretty simple. You then need two external USB HDD caddies (or just hook up both HDDs to your SATA ports if that’s easier) and use the restore option in OSX’s disk utility. It will miraculously map the drive with the desired partition size without issues. Go figure.

Partial workaround for Windows 10’s Guest Account “flicker” issues

Standard

The Guest account in Windows 10 (builds 10240 and 10525, 10532 as well) is a largely problematic thing. It’s difficult to turn on, and once it’s turned on, for most people, it doesn’t work properly because explorer.exe keeps restarting infinitely and this makes it unusable.

To enable the Guest account in Win10:

  1. Launch the Local Settings Management lusrmgr.msc,
  2. Go to Users/Guest and uncheck Account is Disabled
  3. Launch the Local Security Policy secpol.msc
  4. Go to Local Policies/User Rights Assignment/Deny Log On Locally
  5. Remove Guest from the entry
  6. Log off

There’s a partial workaround to the flickering problem as well.

The culprit in question is the c:\Windows\System32\SettingSyncCore.dll  file and given that I can’t debug DLLs I’ll show a bit of a more crude option to dealing with the issue – delete it. This however isn’t entirely simple because the file manages, amongst others elements of the Start menu and sync, so both will be lostish

  1. Since it’s owned by TrustedInstaller, first thing is that you’ll need to take ownership of the file and make sure that you have full control over the file – admins by default don’t have that.
  2. It’s quite possible that you’ll need LockHunter (free) to do the deletion job, as it can be set to delete a file upon login – if that’s the case then be creative and press the relevant button.
  3. I’ve read that supposedly deleting the file will render the whole Start Menu unusable but this isn’t entirely true. For the admin account your Start Menu should work okay but for the Guest it won’t. You’ll need a substitute for it – I use ClassicShell (also free) and I suggest that one for the task. I’d suggest installing this before logging out.
  4. Upon restart, log back into your own account so that LockHunter can delete the DLL file.
  5. Log off and log into Guest
  6. You should be able to use the account as intended. Note that generally there’s an option in ClassicShell to bring up the proper Start Menu but if you click on that now it will do nothing. If you exit ClassicShell you’ll lose your start menu and you’ll need to restart to get it back.

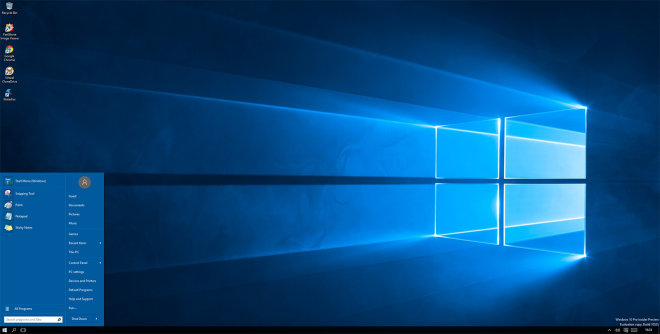
Guest Start Menu w/ ClassicShell ON — the top button doesn’t do anything if the DLL file is deleted:

gueststart

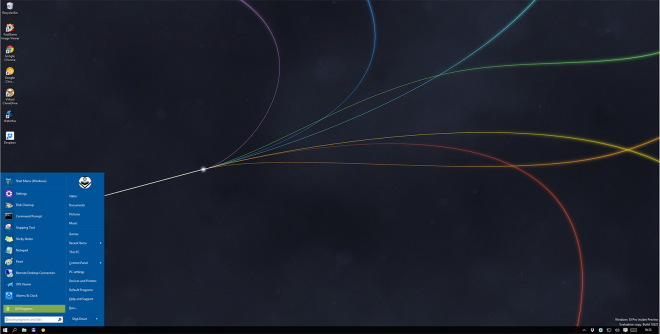
Admin Start Menu w/ ClassicShell ON:

vn_start_cs

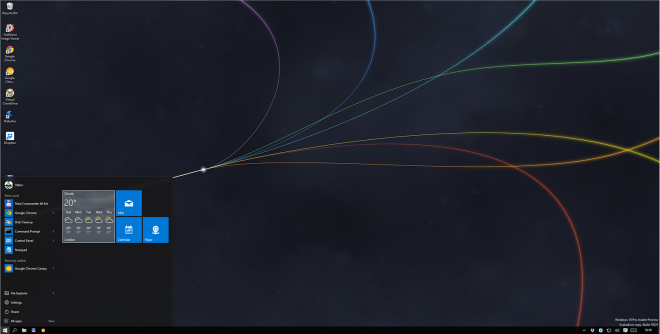
Admin Start Menu w/ ClassicShell OFF (Start Menu still works w/ DLL deleted):

vn_start_full

(Yes it’s a virtual computer, hence the few icons and I have an insider account.)

Windows 10 waking up: “NT TASK\Microsoft\Windows\UpdateOrchestrator\Reboot”

Standard

TL;DR: UpdateOrchestrator is a Task, which is causing the wake-ups. As normal user (inc admins) you can’t kill/modify it so grab ExecTI found here: and run the taskschd.msc then modify as needed. See below for details.

There’s a “feature” in Windows 10 where the system wants to reboot (or wake up the system) at half3 in the morning.

Running powercfg -waketimers returns:

Timer set by [SERVICE] \Device\HarddiskVolume2\Windows\System32\svchost.exe (SystemEventsBroker) expires at 03:29:29 on 09/08/2015.
Reason: Windows will execute ‘NT TASK\Microsoft\Windows\UpdateOrchestrator\Reboot’ scheduled task that requested waking the computer.

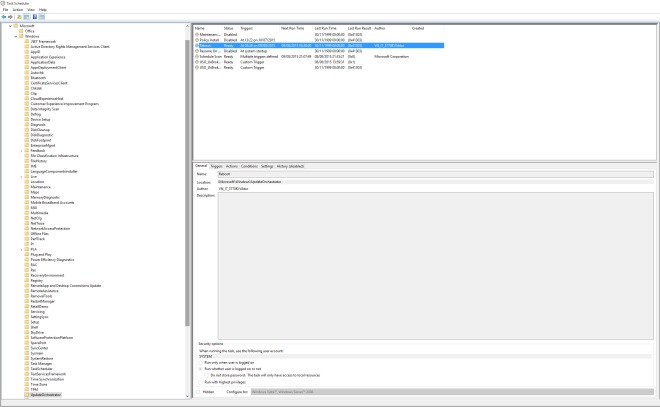
But nothing appears in Task Scheduler – at first. But actually going into the appropriate subkey will show it actually does exist:

wureboot

(click on the img for larger).

Essentially, under Microsoft/Windows/UpdateOrchestrator there’s a task called Reboot. Just need to disable/remove it, easy.

2017/12 update: for a while now Windows has been creating these entries under an elevated user account (S-1-5-18) so you can’t change them. The way around is to use ExecTI found here: and run the taskschd.msc from that. Further explanation here.

Solution to Intel HD4000 & nVidia GTX970 cards clashing/freezing Windows 8.1 and 10

Standard

There’s a fair bit of content online about the existence of this issue but few actual solutions. Long story short, the gfx chip in certain Intel CPUs clashes with certain nV cards resulting in a black screen and a frozen computer. This issue may also interfere w the Win10 upgrade but if it only shows up when you upgrade then you’ve probably figured out the solution already before, it’s just being a b.tch.

My personal setup is an ASUS P8Z77-V DELUXE motherboard (but the issue and solution apply to any make and model, you’ll see later), an Intel 3770k and an Asus NVIDIA GeForce GTX 970 Stryx (4 GB).

Continue reading

The mystery about OS management for parents.

Standard

Slightly random topic, but I dare to make an attempt at it. Long story short, I’ve been reading a number of amusing articles recently on how certain Linux users view Win7 and the other way around. I have little experience with non-Windows OSs, yet I am in a constant search for something for my mum. Try not to laugh.

I’m not an IT-pro, as in it’s not my profession, however I guess, while it’s not impossible for WinXP/Win7 to trick me, I can dodge most of the bullets, as I’ve been playing with the versions and their settings since around 1997. Unlike my parents, who’d panic if the Word icon moved a column. Then they’d Skype me, saying, “Johnny, my computer esta muy loca!” (well, kindof. I’m not Johnny, and they speak Hungarian [only]). So I set out on my quest once to try to find them an OS that requires minimal intervention on my side. I’m willing to learn and get my hands dirty, not the least because I can sandbox with virtual computers without harm. Try to ignore the legal aspect of the question for now.

  • OSx: is a problematic one. The main issue is twofold: 1), it needs a Mac. I know, “no shit, Sherlock!“, but still. Although there are ways around this slight problem, I don’t really want an OS on my parents’ computer that keeps bitching about hardware glitches and lack of drivers, or just offering poor performance bcs of limitations. I think this is a bit of a deal-breaker here, because the price of Apple products are out of bounds with reality.  While I genuinely admire the “Jobsian” marketing machine, I am slightly unsure that a) my parents need an i7 with an SSD [or anything similar], b) Dell’s i7/SSD combo is really £800 worse than Apple’s, especially considering that they are both made by Foxconn. The other problem [2)] is that the system is very closed. Though there are software that can run Windows programs or even emulate it, that defeats the purpose. They don’t have any other Apple products. Furthermore, I don’t actually find the OSx to be that user-friendly. There are a lot of good functions in the OSx that can be useful for people who understand why iCloud is a great idea, but as long as my parents keep mixing up Picasa with Gmail and Dropbox (seriously), I wouldn’t force them too much. Perhaps this hinders the whole switching process, I acknowledge that.
  • Ubuntu: I have a very amusing experience with this. Well, irony. As said, I’m somewhat inexperienced with Linux distributions, so, trying to be genuinely in the shoes of my parents, I downloaded what is supposed to be the most n00b-friendly distro, Ubuntu. Although installation went well, problems ensued when I tried to install Chrome on the system as I was asked to get a C-compiler. Well, compile my ass. Seriously, if I was my mother, I’d then be stuck with a system that doesn’t speak my non-technical language, and no Skype to call anyone to help out. Yes, there’s a version of Firefox, and people can google around for solutions, but that’s not for dummies. Parents are dummies. The same applies for downloading software for Linux. Many of them are poorly documented, and require in-depth knowledge of the system to install/work.  I have found the package manager to be more confusing than helpful. Someone was complaining that Windows does not have a package manager. While this is true, I think the everyday user doesn’t need to get involved with the depths of update-installations. Just update for god’s sake. On the positive side, there has been a positive progress in the recent years towards the ability to run Windows-software. Again, this somewhat defeats the point, yet going cold turkey with the parents is likely to cause an awful lot of headache for me.
  • Unix: I didn’t even bother trying it. It’s not for people who get lost at the first prompt.
  • Windows: what else, it’s still in the pot of options. In all fairness, I’ve still found Windows to be the most parent-friendly OS, but not at all costs. It requires a lot of testing. My parents were switched to Win7 only about a year ago, when I became assured that any silly things that crop up I can handle via TeamViewer. (TV is available for some other OSs, I know.) Win8 is completely out of the question, it won’t happen. Metro would freak them out. And me. Yet Windows is a very mysterious software. It doesn’t work out-of-the-box, because if reinstalled, it takes a long and expensive overseas phonecall to discuss where the (W)LAN drivers might be. And that’s to assume there are any at hand, otherwise, it’s dooooomed. That aside, computers that come with Win pre-installed come with a lot of crap on them. I need to remotely clear all of that. And then hope things work. I spent the last few weeks being annoyed the constant BSODs of my Win7 on a newly built computer, just to find in a forum post that D-Tools can cause cockups like this. No sign of it in the BSOD analyses, no sign of it upon running verifier, nothing. What’s dreadful about Windows is that one can get lucky, and have a (properly maintained) installation that lasts 5-6 years, or one that you do your best to maintain properly, and still dies every two months.

As a conclusion, I’d say two things. Since I’m pretty much an expert at what Windows can throw at a home user, for me that’s home turf, so I’ll probably have an affinity to it. This also means that I was an expert at say Linux, I’d most likely feel similarly about it. At the same time, I still think that once set up properly, Windows does a better job. This doesn’t require constant maintenance if the user understands that downloading all sorts of crap is not a good idea. I guess the last thing is simply that as long as the majority of computers run Windows, and the majority of software are written for Windows. This is an issue, when they need stuff like drivers and interface for a heart-rate monitor and what not. You can call this special needs, but in all fairness, I’m not sure it’s really that special. Perhaps mobile-based software will offset some of the current desktop computing in the future, but that’s still to come. And needs to speak Hungarian, or any other language for that reason.